Quickstart: a quest in your own map
Fifteen minutes from an installed plugin to a quest you can play: Mira has lost her ring by the well, she asks you to find it, and thanks you when you have. No Blueprint graph or C++ is needed.
The steps use a project made from the Third Person template with the plugin enabled (Install). Any project whose player uses Enhanced Input works the same.
1. Add a gameplay tag
Quests hear about what happens in your game through gameplay tags. Finding the ring will report one.
- Open Edit > Project Settings and pick GameplayTags under Project on the left.
-
Click Manage Gameplay Tags… beside Gameplay Tag List. The Gameplay Tag Manager opens.
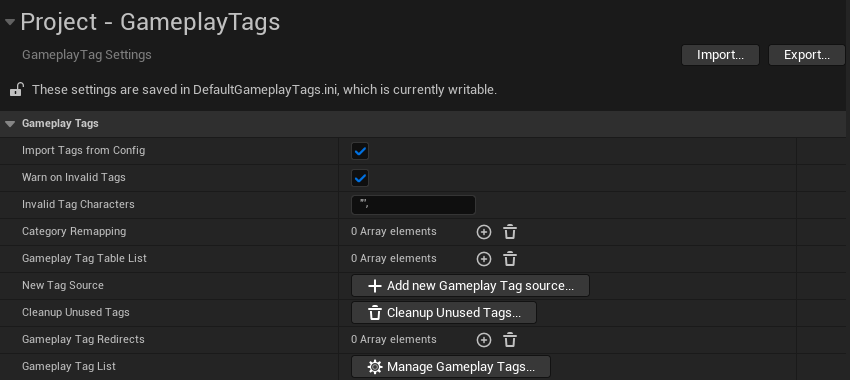
The GameplayTags page; the button is on the Gameplay Tag List row. - Click + at the manager’s top left, type
Quest.Ring.Foundas the Name, and click Add New Tag. The tag shows in the list, underQuestandRing.
2. Make the quest
- In the Content Browser, right-click an empty spot and pick Gameplay > Quest. Name the new
asset
Ringand double-click it to open it. - Fill in Title with
Mira's Ringand Description withMira lost her ring by the old well. - Click + beside Stages to add a stage, and open it with the arrow beside Index [0].
Set its Text to
Search the well. -
Click + beside the stage’s Objectives and open the new objective. Fill in:
Field Value Id FindText Find the ringEvent Tag Quest.Ring.Found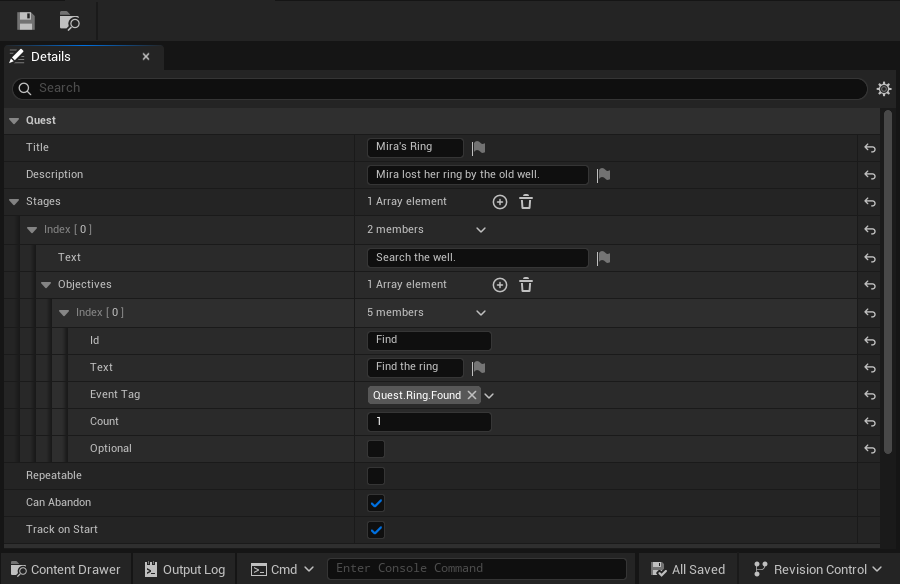
The quest with its stage and objective opened. - Click Save. If anything is missing, such as an objective with no Event Tag, the Message Log says so as you save.
3. Write the dialogue
Dialogue is a text file in the script format. Mira’s checks the quest first, so she says the right thing before, during and after it:
speaker Mira: Mira
if Ring is completed -> thanks
if Ring is active -> waiting
Mira: I lost my ring by the old well. Would you look for it?
* I'll find it. -> yes
* Not now.
Mira: Another time, then.
end

== yes
do start Ring
Mira: Thank you! It's silver, you can't miss it.
end

== waiting
Mira: Any luck by the well?
end

== thanks
Mira: You found it! Thank you.
The first line names who speaks: lines starting Mira: show under the name “Mira”. The if
lines jump to a label (== thanks) when they hold, * lines are choices, and end ends the
talk.
- Save the text above as
Mira.qds, from any text editor. -
Drag
Mira.qdsfrom its folder into the Content Browser. It becomes the dialogue assetMira, beside the quest.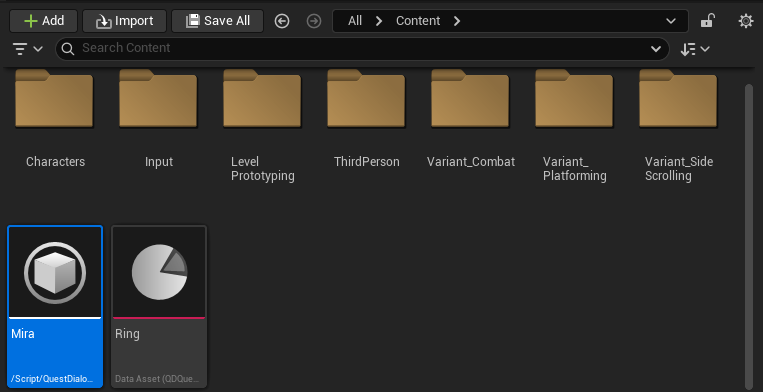
The script imported as the dialogue asset Mira.
If the script has a mistake, the import names its line in the Message Log. After editing the file, right-click the asset and pick Reimport.
4. Place Mira
Anyone the player can talk to carries a Speaker Component: a character, a statue, a sign.
- From
Characters/Mannequins/Meshesin the Content Browser, dragSKM_Quinn_Simpleinto the map near the player start. - With it selected, click + Add in the Details panel, search for
Speaker, and pick Speaker Component. -
Set the component’s Dialogue to
Mira.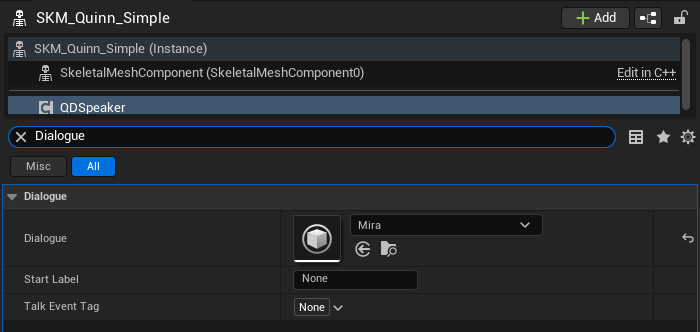
Mira’s Speaker Component, its Dialogue set.
5. Place the ring
A Quest Trigger reports its tag when the player walks into its box.
-
Open Window > Place Actors, search for
Quest Trigger, and drag it into the map some way from Mira.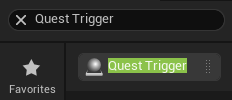
The Quest Trigger in Place Actors. -
In its Details, set Event Tag to
Quest.Ring.Found.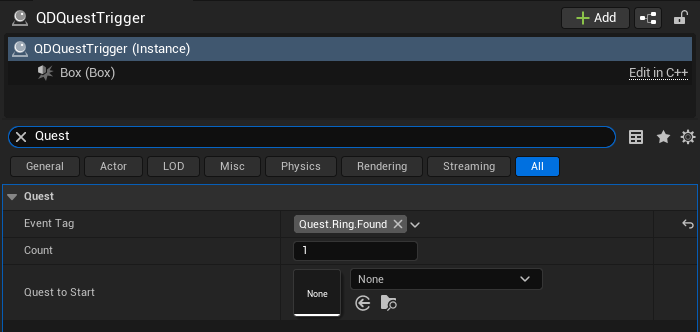
The trigger reports Quest.Ring.Foundonce, completing the objective.
Scale the trigger to fit the spot. Its box catches any pawn a player controls.
6. Play
Press Play.
-
Walk up to Mira and press E. She asks for help. Pick I’ll find it. with the mouse or 1, then press Enter past her thanks. The quest shows at the top right.

Mira’s first line and its two choices. 
The tracker, once the quest has started. -
Press J. The quest log lists Mira’s Ring with its stage and objective. Press J again, or Esc, to close it.
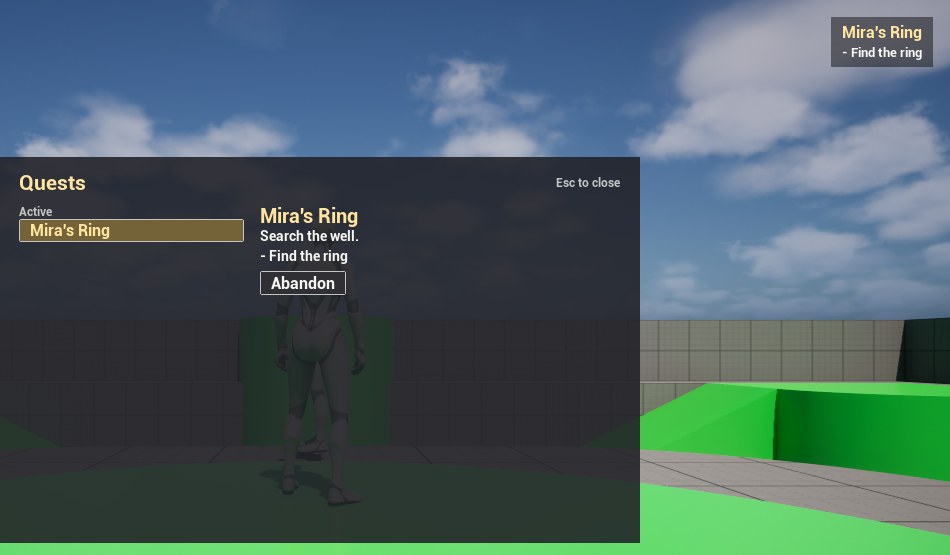
The quest log. - Walk into the trigger. The quest completes and leaves the tracker.
-
Walk back to Mira and press E. She thanks you.

Mira, once the quest is completed.
To watch the quest while you play, press ' (apostrophe) for the Gameplay Debugger: its
Quests category lists the player’s quests, objectives and tags as they change. Or type
Quest.List in the console (`).

If something doesn’t happen as written, Troubleshooting has each step’s usual cause.
Next
- Count kills or pickups with one node from your own Blueprints.
- Give a reward when a quest completes.
- Concepts: how quests, tags and dialogue fit together.