Quickstart: a villager’s day in your level
Fifteen minutes from an installed plugin to a villager who keeps a day in your level: she works in the morning, eats at noon and goes to bed at night, and her score panel shows why. You place an NPC and three spots for her, and play. No Blueprint graph is needed.
The steps use the Third Person template’s level and its mannequin, with the plugin enabled (Install). In your own level, put the spots where they fit; for your own character, see Use your own character.
1. Place a villager
-
Open Window > Place Actors and search for
NL. Drag NL Character onto the floor south of the player start (behind it as the level opens), and name itAdain the Outliner.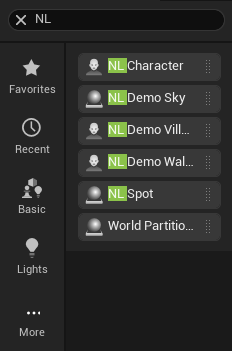
NL Character and NL Spot in Place Actors. The NL Demo ones are the demo town’s. -
In its Details, select the Mesh component and set:
Field Value Animation Mode Use Animation Blueprint Anim Class ABP_UnarmedSkeletal Mesh Asset SKM_Quinn_Simple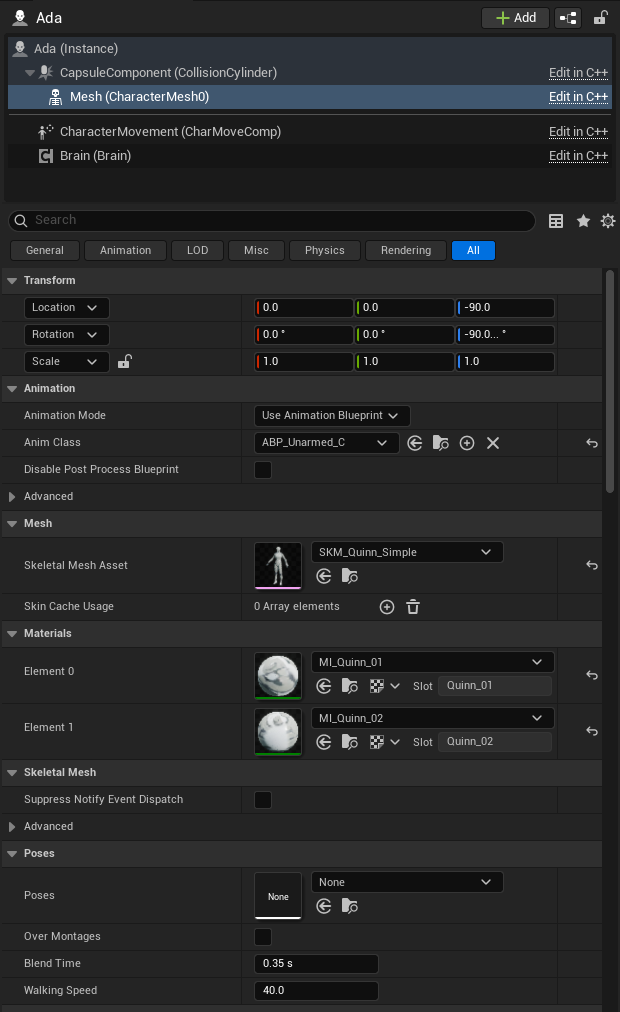
The template’s Quinn, walking with its own Anim Blueprint. -
Select the Brain component and set:
Field Value Display Name AdaRole R_Villager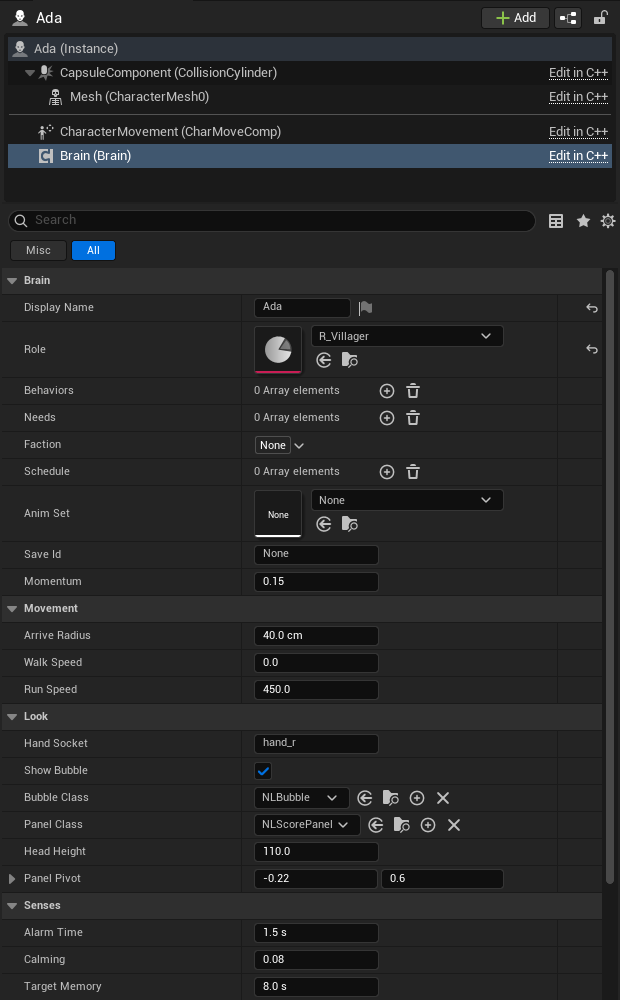
The Brain: her name and her role. What’s left empty comes from the role.
The role is the plugin’s villager: her needs (food, energy, company), her eight behaviours, and a day plan of sleep till 06:00, work from 08:00 to 17:00 with lunch at noon, and company in the evening.
2. Place her spots
A spot is where a behaviour is done: Work at a work spot, Eat at an eat spot.
-
From Place Actors, drag three NL Spots onto the floor, name them in the Outliner, and in each one’s Details set its Kind, its Location (X and Y; Z stays on the floor) and its Rotation Z:
WorkSpot: KindNPC.Spot.Work, Location-1100,-900, Rotation Z180.EatSpot: KindNPC.Spot.Eat, Location-1100,900, Rotation Z180.SleepSpot: KindNPC.Spot.Sleep, Location-1300,0, Rotation Z0.
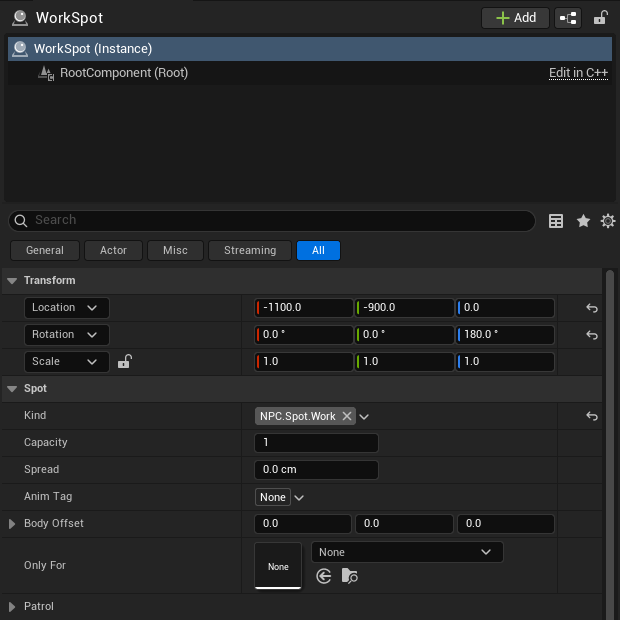
A work spot. Its arrow is the way the NPC faces while she works. - NPCs walk on the navmesh, which the Third Person level doesn’t have. From Place Actors > Volumes, drag a Nav Mesh Bounds Volume in and scale it over the floor. Press P in the viewport: the floor shows green.
- Save the level (Ctrl+S).
3. Play
Press Play, and turn round to face south.
- It’s 08:00 on the plugin’s clock, which runs an hour a real minute. Ada walks to the work spot and bends to her work; the bubble over her head says Work.
-
Open the console (`) and type
Npc.Debug Ada. Her score panel opens beside her: the clock, her needs, her plan, and each thing she could do with its score. Work wins, since her plan says work and she’s rested and fed. Most of the rest score 0 for want of a spot, such as No free Sit spot: this level has only her three. A spot of that kind brings it into play.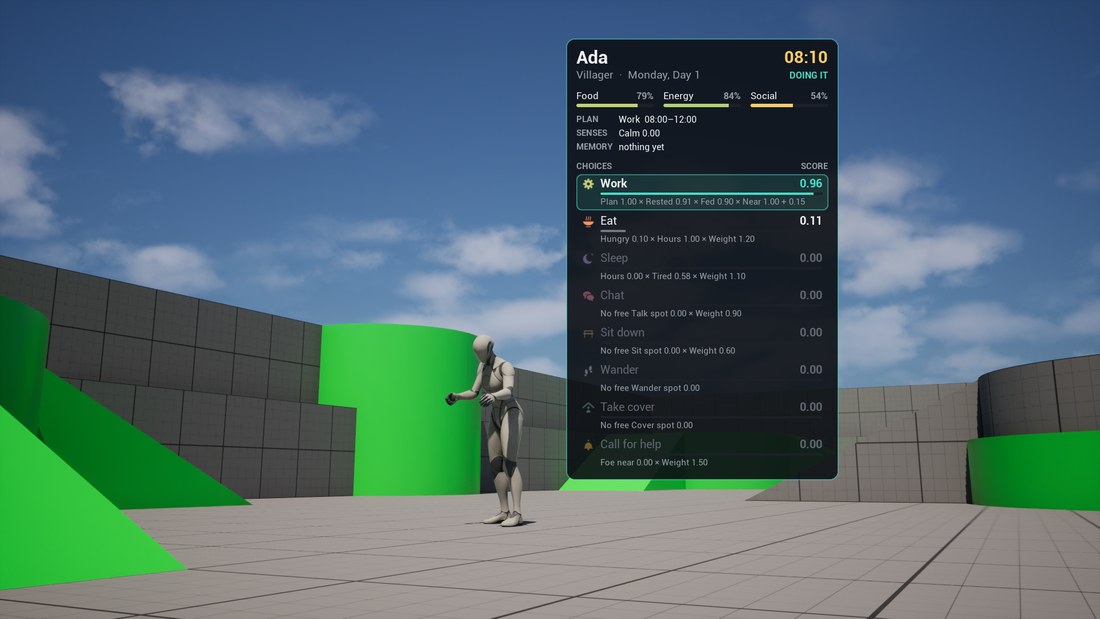
Npc.Debug Ada: why she works. -
Type
Npc.Time 12, thenNpc.Need Ada Food 0.3. It’s noon, so her plan stops work, and she’s hungry: Eat scores best, and she walks to the eat spot. Food fills while she eats.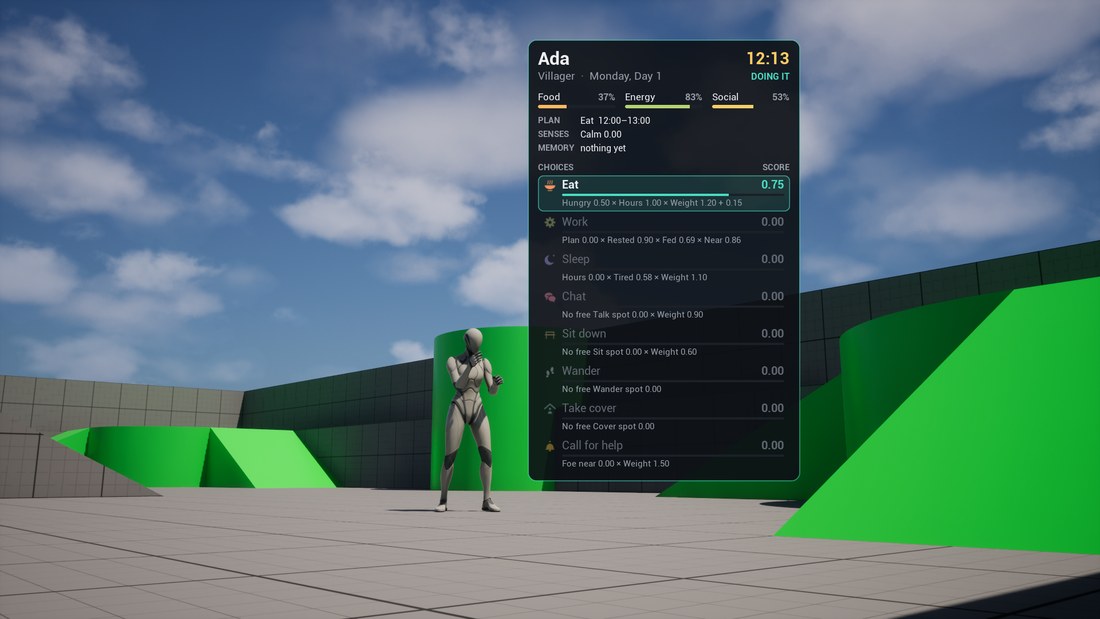
Noon, and hungry: lunch. Jumping the clock skips the hours in between, so her food didn’t fall on the way: that’s what
Npc.Needstands in for. Left to run, her needs fall by the hour on their own. -
Type
Npc.Time 22.5. She goes to the sleep spot and lies down.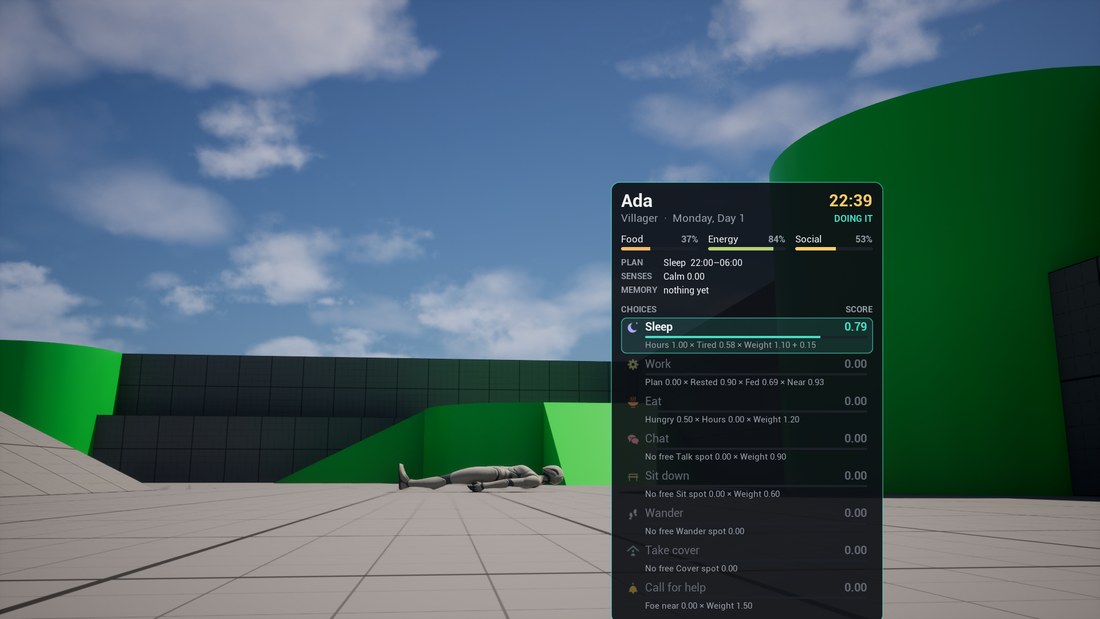
Npc.Time 22.5: bed. - Type
Npc.Debug offto close the panel.
Npc.Why Ada prints the same scores in the Output Log, term by term, and Npc.Speed 30 runs the
clock thirty times faster to watch a whole day. For the Gameplay Debugger, press '
(apostrophe) while looking at her: its NPCLife category shows her state.
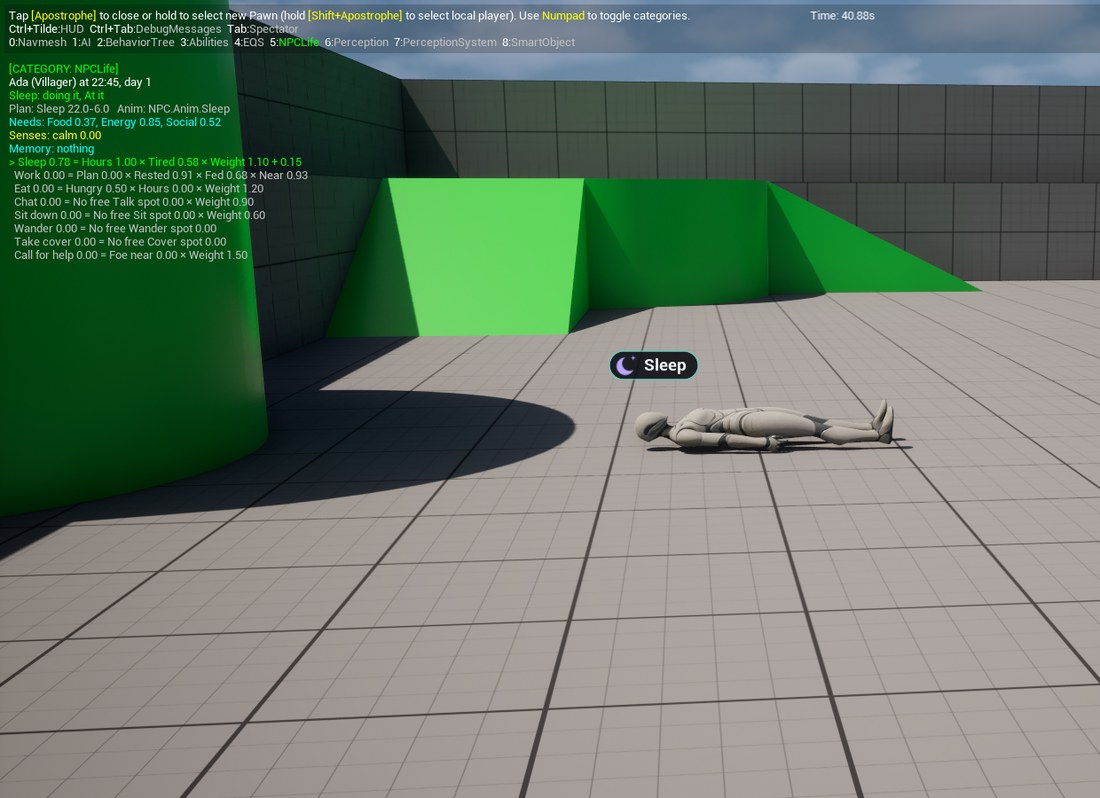
If something doesn’t happen as written, Troubleshooting has the usual causes.
Next
- Use your own character and animations.
- Make a behaviour of your own.
- Concepts: brains, behaviours, roles, day plans and spots.