Quickstart: a field and a pond in your own map
Fifteen minutes from an installed plugin to a turnip you planted, watered and harvested, and a fish you caught. No Blueprint graph or C++ is needed.
The steps use a project made from the Third Person template with the plugin enabled (Install). Any project whose player is a pawn on Enhanced Input works the same.
To see it all working first, play the demo that comes with the plugin.
1. Give the player seeds
The plugin ships ten crops to start from. A turnip is the quickest: it grows in spring, the season play begins in, and is ready after three watered days.
- Open Edit > Project Settings and pick Farming & Fishing under Plugins on the left.
-
Click + beside Player Seeds and pick from the new entry’s list, adding
DA_Crop_Turnipto Player Seeds.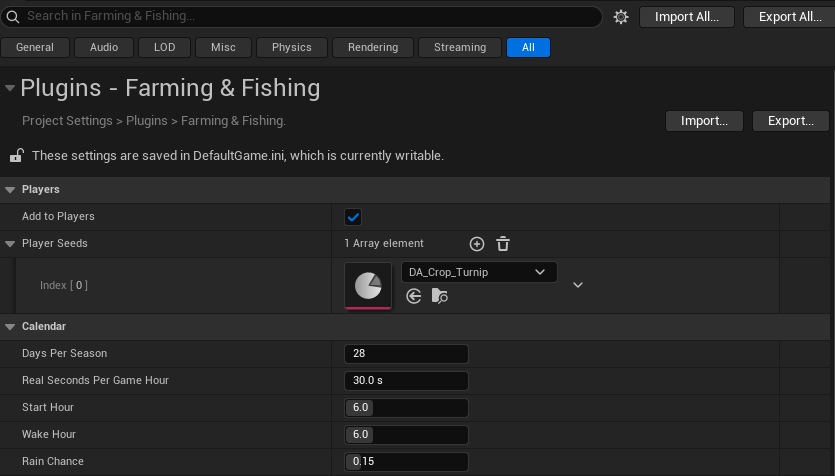
Player Seeds with its one entry, the turnip: every player now carries turnip seeds.
Every player’s Farmer Component now carries turnip seeds. The other crops are beside it in Plugins > Farming & Fishing System > Data > Crops; Crops and fish lists their seasons and growing times.
2. Place a field
-
Open the Place Actors panel (Window > Place Actors) and search for
Farm Area.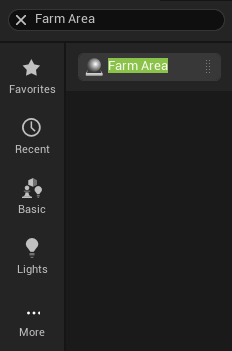
Farm Area in Place Actors. - Drag Farm Area onto the ground a few metres in front of the Player Start. A green box appears, 10 m square.
-
With it selected, find Box Extent in the Details panel and set it to
300,300,100. The field is now 6 by 6 tiles of 1 m.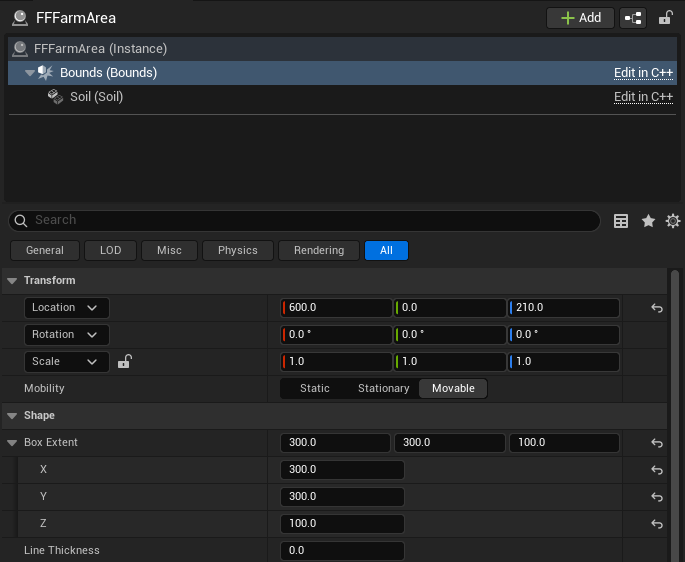
Box Extent is on the area’s Bounds box: pick it at the top of the Details if you don’t see it.
The box’s middle should sit about on the ground: the tiles are laid on whatever ground lies between its top and bottom, so a slope or a landscape works too.
3. Farm
-
Press Play and walk up to the field. The tile in front of you is outlined, and the text above the tool bar says what it holds.
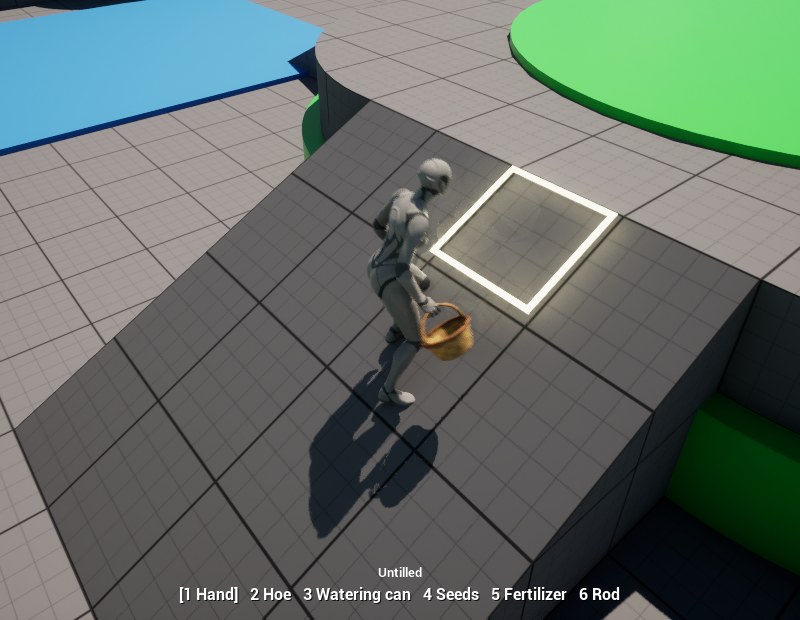
The targeted tile, and over the tools what it holds. - Press 2 for the hoe and click: the tile is tilled.
-
Press 4 for the seeds and click: a turnip seed is planted.
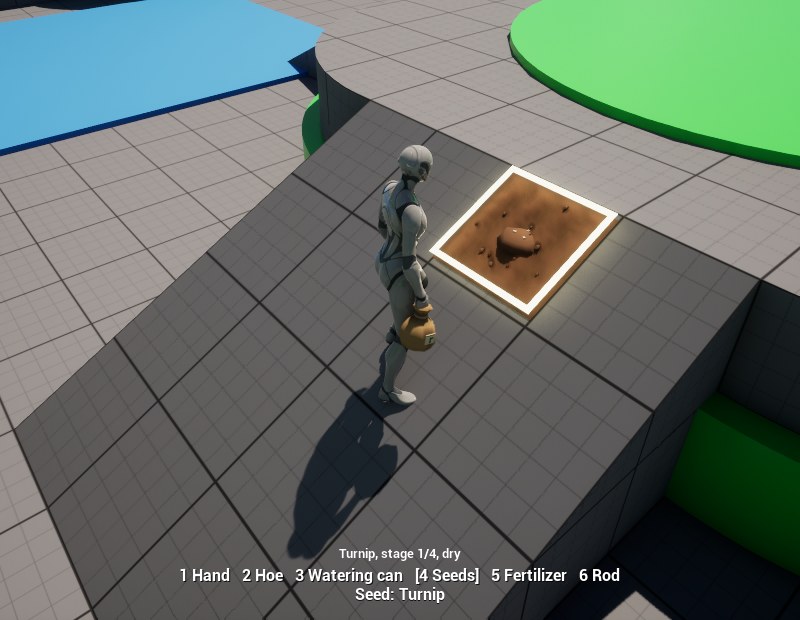
Planted. The line under the tools names the seed; E picks the next. -
Press 3 for the watering can and click: the soil darkens, watered.
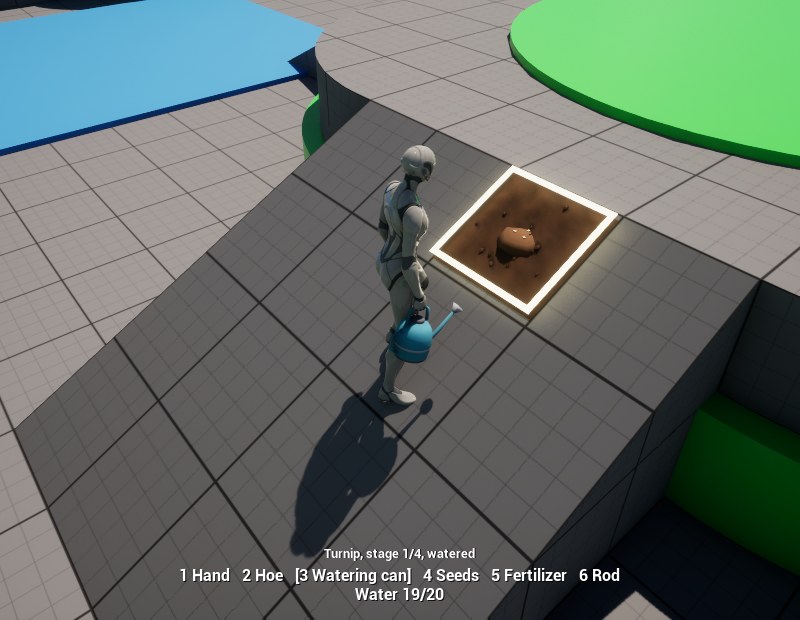
Watered soil is darker. The can holds 20 waterings and refills at a Fishing Water; rain waters every field. -
Open the console with ` and type
Farm.Day. The clock moves on 24 hours, past midnight, and the watered turnip grows a stage. Every tile starts a new day dry: water the turnip again before eachFarm.Day, and type it twice more. -
After the third
Farm.Daythe date reads Spring 4 and the turnip is ready. Press 1 for the hand and click to harvest it.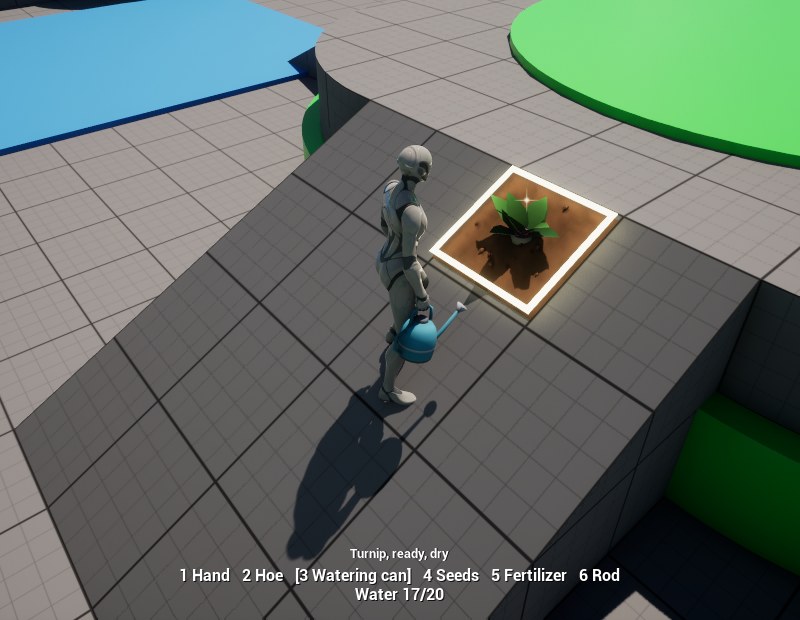
Ready to harvest.
Left to run, the calendar moves on 30 real seconds a game hour, so a game day takes 12 minutes. A crop left dry for three days withers: clear it with the hand or the hoe.
[!TIP]
Farm.GrowAllbrings every crop to its ready stage at once, andFarm.Seasonjumps to the next season. The reference lists all the commands.
4. Make a pond
- If your map has no water yet, place a Cube from Place Actors, flatten it to a pond
(scale it to
12,8,0.2) and give it a blue material. Put it on the ground to one side of the field. - Search Place Actors for
Fishing Waterand drag it onto the pond. Set its Box Extent to cover the water, and move it so the top of the Fishing Water’s box is level with the water’s surface: that is where the bobber floats. -
Set its Fish Table to
DA_FishTable_Pond, whose bluegill bite in every season, at any hour.
The pond’s settings. Refills Cans lets the watering can fill here.
5. Fish
- Press Play and stand at the water’s edge, facing it.
-
Press 6 for the rod, then hold the left mouse button. The bar above the tool bar, labelled Charge, fills amber, and a marker shows where the bobber will land: 3 m ahead for a tap, up to 14 m for a full second’s hold.
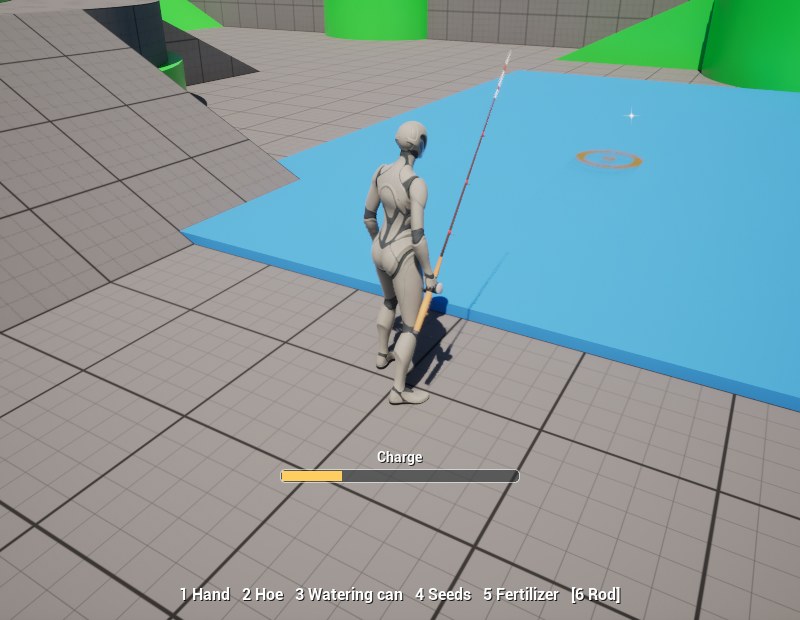
Charging a cast. The marker shows only over a Fishing Water. -
Release to cast, and wait. When Bite! shows, click at once to hook the fish.
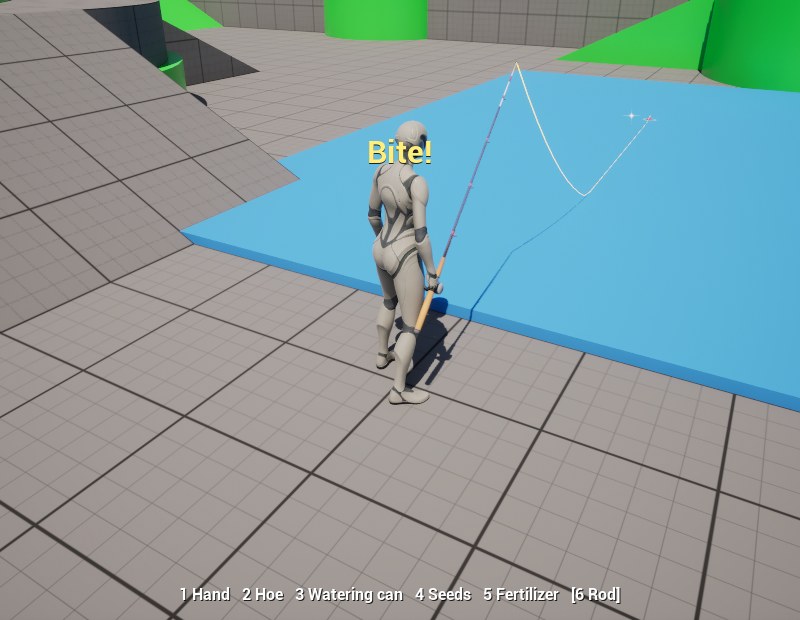
A bite lasts about a second: click before it passes. -
Hold the button to reel and let go to give slack, keeping the tension bar green until the fish tires; in the green it tires twice as fast while you reel as with slack. The bar turns red when the tension is too low (the fish rests) or too high; at the top the line snaps.
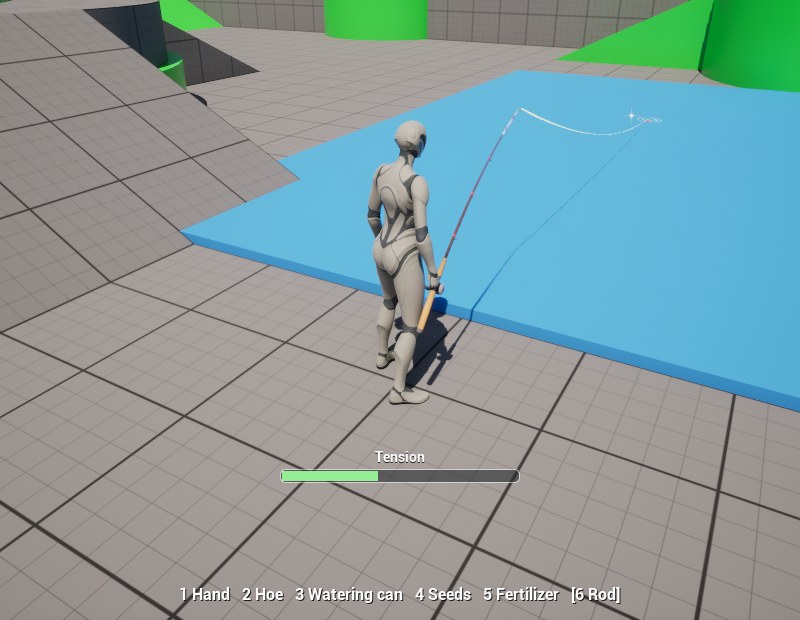
Reeling: hold to raise the tension, let go to lower it. -
The fish is caught: the HUD names it and its size.
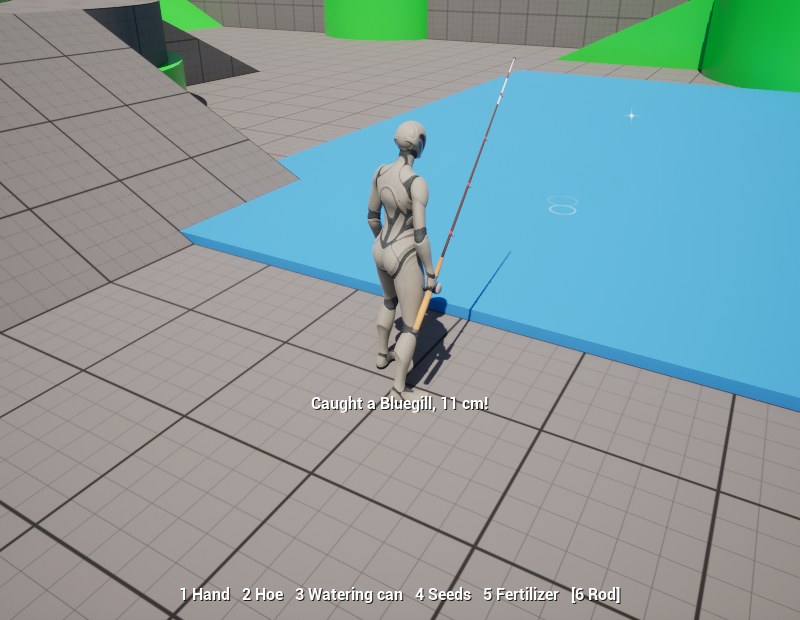
Caught.
Fish.Table in the console says which fish can bite at each water now, and why the others can’t.
Play the demo
The plugin comes with a small farm to play: a field already growing, a pond with a dock, and a cottage with a bed to sleep in.
- In the Content Browser, open Settings and turn on Show Plugin Content, and Show Engine Content too if the plugin is installed to the engine.
- Open Plugins > Farming & Fishing System > Demo > L_Farm and press Play.
The panel on the left lists the keys: 1 to 6 or the mouse wheel pick a tool, the left mouse button uses it, E picks the next of the ten crops’ seeds, Z sleeps by the bed and F3 moves on a season. F5 saves the farm and F9 loads it. The basket on the right counts what you harvest and catch.
For two players, set Number of Players to 2 and Net Mode to Play As Listen Server under the Play button’s menu, then Play. The map uses its own game mode, so your project’s stays as it is. Its farmer wears the Third Person template’s mannequin where your project has it.
Where to go next
The harvest and the catch have gone nowhere yet: the plugin hands them to your game’s inventory, which the first how-to connects. Then:
- your own crop and your own fish;
- your day and night cycle driving the calendar;
- saving the farm and multiplayer.