Install
From Fab to the plugin enabled in your project, in a few minutes. It works the same in a Blueprint-only project and a C++ one.
Install it to the engine
- In the Epic Games Launcher, open Fab Library and find World Map, Minimap & Compass System.
-
Click Install to Engine and pick your engine version (5.6, 5.7 or 5.8).
The launcher copies the plugin into the engine’s
Engine/Plugins/Marketplacefolder, ready built. Every project on that engine can now enable it.
Enable it in your project
- Open your project and pick Edit > Plugins.
-
Search for
Minimapand tick World Map, Minimap & Compass System.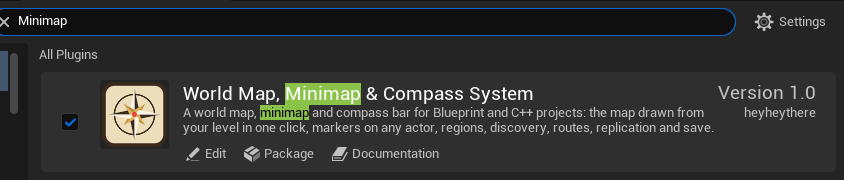
The plugin in Edit > Plugins, ticked. - Click Restart Now. The editor reopens with the plugin on.
Enabling it adds, with nothing else to set up:
- a Player Map component on every player’s controller as they join, which keeps their fog, pins and tracking;
- the Map HUD on each player’s screen: the compass bar, the minimap, markers on screen and the area toast, shown in any level with a Map Region;
- a key: M opens the world map (the Menu button on a gamepad);
- Map Region, Map Area and Map Marker in Place Actors, and a Marker component for any actor.
Each of these can be changed or turned off under Project Settings > Plugins > Map, Minimap & Compass (the settings).
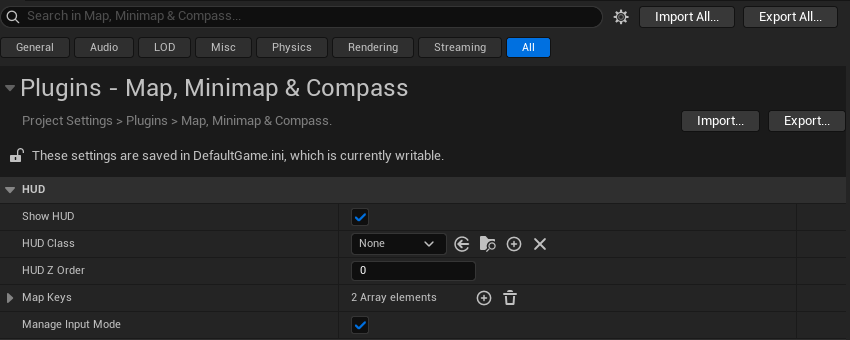
The plugin’s own content (its icons and the demo valley) is under Plugins > World Map, Minimap & Compass System in the Content Browser. If you don’t see it, open the Content Browser’s Settings and turn on Show Engine Content and Show Plugin Content: installed to the engine, it counts as both.
Use it from C++
Blueprint-only projects need nothing more. In a C++ project, add the module to your game
module’s Build.cs to call the plugin from your code:
PublicDependencyModuleNames.AddRange(new string[] { "MapCompass" });
Then include what you use, such as MCPlayerMapComponent.h and MCMarkerComponent.h. The
how-tos give the C++ beside each Blueprint answer.
[!TIP] A team or a build machine needs the plugin too. Copy its folder from
Engine/Plugins/Marketplaceinto your project’s ownPluginsfolder and commit it; the project then builds it with its own code, so a machine that packages the game needs Visual Studio with its C++ tools, as for any code plugin in a project.In a Blueprint-only project, also open the copied
MapCompass.upluginin a text editor and add the line"EnabledByDefault": false,after"CanContainContent": true,. Without it the packaged game is the engine’s ready-built one, without the plugin, and stops as it starts with “Unable to load plugin”. The project keeps the plugin ticked in Edit > Plugins either way.
Update it
When a new version is out, the Fab Library offers it. Close the editor, install it to the engine again, and open your project. Your regions, markers and save games carry over; the changelog says if a version needs anything of you.
Remove it
- Delete the Map Regions, Map Areas and Map Markers from your levels, the Marker components from your actors, and the Blueprints that call its nodes.
- Untick it in Edit > Plugins and restart the editor.
[!WARNING] Levels holding its actors, and Blueprints using its nodes, don’t load or compile cleanly without the plugin. Remove them before you disable it.