Install
From Fab to the plugin enabled in your project, in a few minutes. It works the same in a Blueprint-only project and a C++ one.
Install it to the engine
- In the Epic Games Launcher, open Fab Library and find RPG Skill Tree & XP System.
-
Click Install to Engine and pick your engine version (5.6, 5.7 or 5.8).
The launcher copies the plugin into the engine’s
Engine/Plugins/Marketplacefolder, ready built. Every project on that engine can now enable it.
Enable it in your project
- Open your project and pick Edit > Plugins.
-
Search for
Skill Treeand tick RPG Skill Tree & XP System.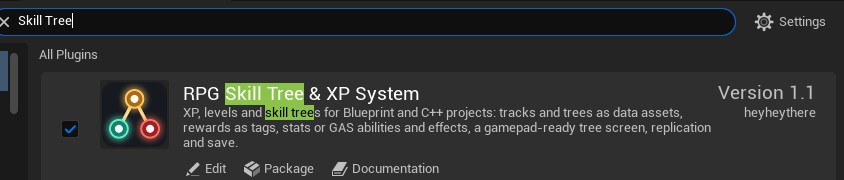
The plugin in Edit > Plugins, ticked. - Click Restart Now. The editor reopens with the plugin on.
Enabling it adds, with nothing else to set up:
- a Progression Component and a Stat Component on every player’s PlayerState;
- a key: K opens the skill trees (View on a gamepad);
- an XP bar for each of the player’s tracks at the top left, and a toast on each level up;
- Progression Track and Skill Tree under Gameplay in the Content Browser’s right-click menu.
Each of these can be changed or turned off under Project Settings > Plugins > RPG Skill Tree & XP System (the settings).
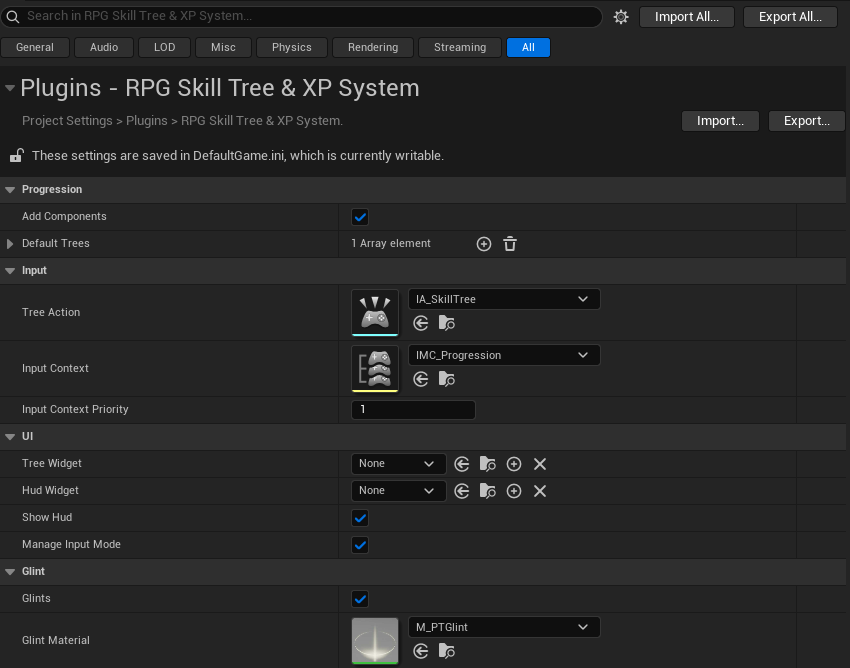
The plugin’s own content (its input, icons and the demo yard) is under Plugins > RPG Skill Tree & XP System in the Content Browser. If you don’t see it, open the Content Browser’s Settings and turn on Show Engine Content and Show Plugin Content: installed to the engine, it counts as both.
[!NOTE] The plugin turns on two of the engine’s plugins with it: Enhanced Input, which every project made from Epic’s templates already uses, and Gameplay Abilities, for the nodes that grant abilities and effects. A project that doesn’t use the Gameplay Ability System needs nothing of it. An older project not yet on Enhanced Input needs Default Player Input Class set to EnhancedPlayerInput under Project Settings > Engine > Input.
Use it from C++
Blueprint-only projects need nothing more. In a C++ project, add the module to your game
module’s Build.cs to call the plugin from your code:
PublicDependencyModuleNames.AddRange(new string[] { "ProgressionTree", "GameplayTags" });
Then include what you use, such as PTProgressionComponent.h and PTLibrary.h. The
how-tos give C++ where both apply.
[!TIP] A team or a build machine needs the plugin too. Copy its folder from
Engine/Plugins/Marketplaceinto your project’s ownPluginsfolder and commit it; the project then builds it with its own code, so a machine that packages the game needs Visual Studio with its C++ tools, as for any code plugin in a project.In a Blueprint-only project, also open the copied
ProgressionTree.upluginin a text editor and add the line"EnabledByDefault": false,after"CanContainContent": true,. Without it the packaged game is the engine’s ready-built one, without the plugin, and stops as it starts with “Unable to load plugin”. The project keeps the plugin ticked in Edit > Plugins either way.
Update it
When a new version is out, the Fab Library offers it. Close the editor, install it to the engine again, and open your project. Your tracks, trees and save games carry over; the changelog says if a version needs anything of you.
Remove it
- Delete or move out of
Contenteverything made with it: tracks, skill trees, and Blueprints that call its nodes. - Untick it in Edit > Plugins and restart the editor.
[!WARNING] Track and tree assets, and Blueprints using its nodes, don’t load or compile without the plugin. Remove them before you disable it.