Your own kit
The village’s look comes from a kit, a VG Kit data asset listing its meshes. The stylized kit is the default; point a village at a kit of yours to build the same layouts from your art.
Start from the stylized kit
- In the Content Browser, under Plugins > Procedural Village Generator > Kit, right-click
DA_VG_StylizedKitand pick Duplicate. Move the copy into your own folder. - Open it and swap in your meshes, a style or a prop at a time. What you don’t replace stays stylized, so the village keeps building as you go.
- Set the village’s Kit to your asset. Click Generate to rebuild after changing the kit.
The village type names wall and roof styles by Name (Stone, Plaster, Thatch…). Keep
the names the type uses, or change the type’s rings and roles to your styles’ names.
The grid
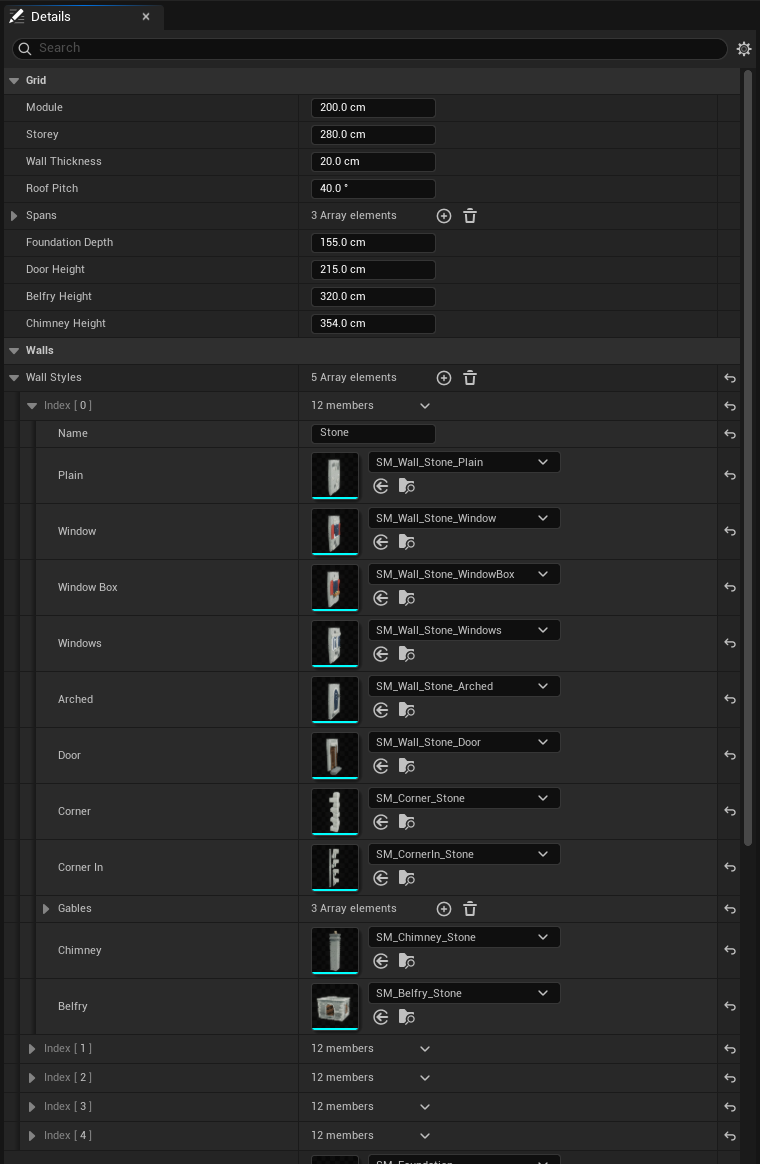
Every piece sits on one grid, which the kit’s Grid fields describe:
| Field | Stylized kit | What it is |
|---|---|---|
| Module | 200 cm | A wall module’s width. |
| Storey | 280 cm | A storey’s height, floor to floor. |
| Wall Thickness | 20 cm | |
| Roof Pitch | 40° | |
| Spans | 400, 600, 800 cm | The building widths the gables and roofs come in, each a whole number of modules. |
| Foundation Depth | 155 cm | How far a foundation reaches below the floor: the most the ground may fall under a building. |
| Door Height | 215 cm | For the canopy over a door. |
| Belfry Height | 320 cm | The church tower’s top storey, the belfry. |
| Chimney Height | 354 cm | How high a chimney stands from its pivot, to clear the ridge. |
If your modules are 300 cm wide, set Module to 300 and Spans to multiples of 300.
Walls
A wall style is a set of modules of one material: stone, plaster, timber. Each is one module wide, stands on its storey’s floor with its pivot at the middle of its bottom edge on the building’s outline, and faces out along +X.
| Piece | Needed | What it is |
|---|---|---|
| Plain | yes | A wall with no opening. |
| Window | yes | A wall with a window. |
| Window Box | A window with a flower box. Window when empty. | |
| Windows | Two narrow windows. Window when empty. | |
| Arched | A tall round-headed window, the church’s. Window when empty. | |
| Door | yes | A wall with a door. |
| Corner | yes | An outer corner, its pivot at the outlines’ corner, filling the (+X, +Y) quarter. |
| Corner In | An inner corner for L and T houses, standing where the walls meet round the open (+X, −Y) quarter. Without it on every style, no L or T houses are built. | |
| Gables | yes, one per span | The end wall’s triangle under the roof, on the top storey, facing +X as a wall does. |
| Chimney | On most houses, up through the roof by a gable. | |
| Belfry | The church tower’s top storey, its pivot at its middle on its floor. With a roof style’s Spire, the tower ends in a belfry and spire; without, it’s roofed as a house. |
Foundations go under every wall: Foundation under a wall module and Foundation Corner under a corner, both needed, reaching Foundation Depth down. Floor is a module-square floor, its top at the storey’s floor; without it, the ground shows inside.
Roofs
A roof style has its pieces once per span, in the order of Spans, each with its pivot on the ridge’s line at the eaves’ top:
| Piece | Needed | What it is |
|---|---|---|
| Roof | yes, per span | One module of roof along Y. |
| Roof End | yes, per span | The overhang past a gable, out toward +Y. |
| Roof L | for L houses | The span-square where the ridge turns, its ridges leaving toward −Y and +X. |
| Roof T | for T houses | The square where a wing’s ridge (+X) meets the body’s (along Y). |
| Canopy | Over a door, its pivot at the wall’s face. | |
| Spire | Over a wall style’s Belfry, its pivot at the middle of the belfry’s top. |
Thickness is the roof slab’s, for where a chimney meets it.
L and T houses are built only when every wall style has a Corner In and every roof style a Roof L and a Roof T for every span. Leave them out and every house is a plain rectangle.
Props, trees and grass
Props maps each kind of thing to a list of meshes, picked from by seed. A kind with no meshes isn’t placed.
| Kind | Where it goes |
|---|---|
| Well, Notice Board, Bench, Planter, Cart, Sack | On the square. Bench, Planter, Cart and Sack in yards and along fronts too. |
| Stall, Ware | Market stalls round the square, and wares beside them. |
| Lamp | Along the main roads and round the square. |
| Signpost | Where roads meet. |
| Fence, Shed | Round and in the yards. |
| Bush, Rock, Tree | On open ground and by houses. |
| Pine | The woods at the rim. |
| Grass, Flower | Tufts on open ground, drawn out to Grass Distance (6000 cm), without shadows or collision. |
Each prop’s pivot is at its foot, on the ground.
Crops are named (Wheat, Corn, Cabbage, Pumpkin): each has a Patch, a field’s
square, and a Bed, a yard’s bed, both pivoted on the ground at their middle. The type’s
Crops list picks among them by name.
The ground’s decals
Road Decal, Square Decal and Soil Decal are deferred decal materials laid on the ground for the roads, the square and the fields’ and beds’ soil. The village’s own meshes don’t receive them, only your ground.
Collision
Buildings and the larger props get collision from their meshes, so give your meshes simple collision. Crops, grass, flowers, bushes, wares, sacks and planters get none.
Checking a kit
Save the kit and Data Validation checks it (or right-click it and pick Asset Actions > Validate Assets). It names each missing piece: “The kit has no Stone’s Door wall”, “The kit has no Slate roof end for the 800 cm span”, and a span that isn’t a whole number of modules.